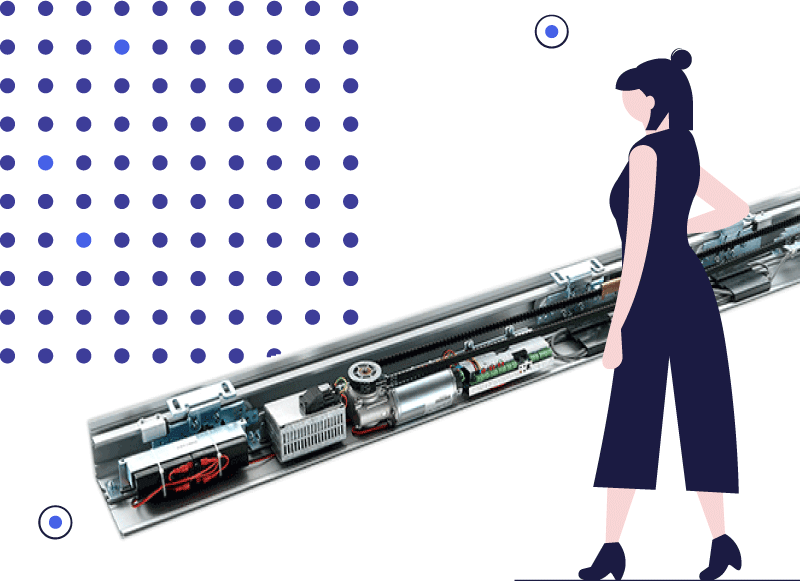
Automatic door opening system
Installing a automatic door opener can modernise any commercial or residential space. They allow visitors to come and go without having to come into contact with a conventional door. We are an industry leader in automatic door openers providing high-quality automatic open doors systems at a competitive rate.
About Caesar Door
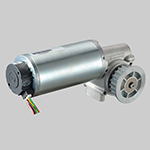
Caesar Door – one of the best automatic door manufacturers from China , is the industry leader in manufacturing automatic doors with over ten years’ experience. Our products are CE and RoHS certificated, while being authorized by Dunkermotoren. Our ES series automatic doors are fitted with a motor by Germany Dunker.
The Caesar Door product range includes automatic sliding doors, automatic curved sliding doors, telescopic sliding door and heavy-duty sliding door operators. We offer our products with a wider variety of floor springs, glass fittings, and pull handles. Our auto open door can be customised to meet every client’s needs.
Featured On


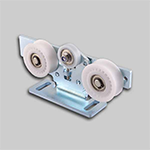
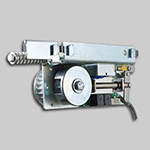
Automatic Sliding Door Operator
This sliding door operator has a dual motor and is ideal for doors of a heavier weight. It is made using industrial-strength hardware and provides smoother functioning and operational control.
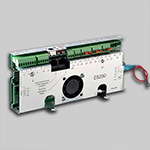
EC100 Automatic Door Controller
Our EC100 controller is compatible with the Kaba SLM or Gilgen SLM KLESE control box, allowing for automatic self-diagnostic.
ECdrive Automatic Door DPS
This system allows you to ensure your door remains permanently open by deactivating the movement detector system. A night-mode setting allows you to electrically lock the door to prevent entry.
Hidden Automatic Door
Open a hidden passageway in your residential or commercial property with these unique auto doors. Our Flush Mount Bookcase Door is an ideal addition to any study or private office, giving you space for a private area or for additional safety measures.
Product Range
The innovative technology behind swing door operators mean that we can convert almost any traditional door into a modern auto door system. A swing door is an essential for commercial areas with high-traffic or where employees are carrying heavy loads. Automatic door opener with remote control allow your visitors to open the door without a single touch. Switching to an auto door opener is a part of modern health and safety policy, reducing the number of high-touch areas on your property to limit the spread of illness. These low energy automatic doors are cost-effective, safe to use, and a modern essential for every commercial or large residential property.
– Swing Door Operators
Automatic door openers are an essential for converting your existing property into an accessible building for those who are disabled or require additional support. Disability discrimination legislation across the globe is increasingly requiring automatic doors in large-scale properties with public access. Caesar Door is here to help you find a cost-effective low energy solution to improving your building’s accessibility rating. We offer a unique approach to every project, working closely with our clients to find an automatic door solution that works for their needs. Every component in our automatic doors is made to the highest quality, giving our customers to ultimate peace of mind. Our ED100 automatic door system is the most popular choice in the industry, giving you a high performance with unbeatable reliability.We offer our swing door operators for both single and double door installations.
– Accessibility
Any modern property can benefit from installing an automatic door opener system. In some properties, they are a modern essential and even a legal requirement to meet accessibility and disability regulations. With an automatic opening door system, you don’t have to require a receptionist or employee to manually open doors to assist visitors. Specific properties like hospitals, distribution centres, and public venues find it essential to operate with the latest swim door operators. Automatic door openers allow them to operate to the highest level of efficiency and to ensure the steady flow of traffic into and out of the building. Care homes and properties that regularly have elderly visitors require swing door operator systems to allow for independence and added convenience.
– Auomatic Door Openerst
At Caesar Door, our autom door service covers everything that you need for your low energy system. We provide remote control opening, pull handles, and glass fittings. With our contemporary automatic door openers, you can wave goodbye to worrying about keys and heavy-duty doors that are difficult to open. Swing door operators convert any property into a welcoming space for you and your visitors. They are a low energy solution to accessibility issues and are becoming a modern health and safety essential for high-traffic areas.
– Full Service